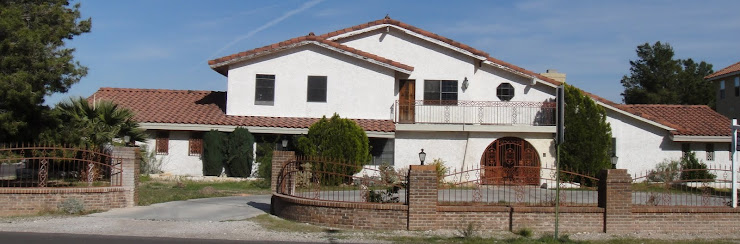
Lisa Lane

Lisa Lane
The day we bought this clunker

Friday, December 10, 2010

Chapter 22 - Rock Work & the Finished Turret

In Chapter 18 - Entrance, Roof & Stucco you can see the demolition of the entrance and front of the house. Once the demolition was completed, we started to rebuild the entrance by creating a "Romeo & Juliet" balcony and a Grand Entrance with a turret. By October, the turret was ready for the rock finish.

Steve and I went back to the rock store several times to decide on just the right look. We chose the French Villa Chateau - Chablis fnish. The stones had a beautiful combination of brown, red and a little darker orange.  

The stone is not real stone but the fabricated concrete that is so popular out here in Las Vegas. It's about 1/4 the cost of real stone but adds color, style and a lovely finish to the home.

Pablo was the stone mason and he was terrific. He brought 20 years experience to our project and it showed in his excellent craftsmanship. The outside of the turret was actually finished in 4 days while the iron-railed  Juliet balcony was completed right along side. 
One of our favorite features is the floor pavers and bull-nosed step that give the entrance a very  "grand" but inviting look. The landscapers designed the pavers so that right by the door we could have small cypress trees, bushes and flowers with irrigation.  The entrance also has new 14 foot solid mahogany doors and Steve finished the roof with cedar planking. (Not one wood knot in any of the planks!) We will hang a gorgeous bronzed chandelier as the final touch.


Monday, December 6, 2010

Chapter 21 - Finished Roof & HVAC

The house had the original Heating, Venitaling and Air-Conditioning system from 1978. It was time for a huge update. We worked with a great company called Wrich. It's hard to belive that right before we bought this house two families were living here and it was not heated or air-conditioned. (Not even the mice
survived as we found out when we took down the ceilings).

It wasn't as simple as just changing out the units. Some of the refrigeration lines were broken and had to be replaced. The lines run through the ceiling of the house. After most of the ceilings and drywalls were replaced, textured and painted, it was about mid-October. Temperatures were beginning to cool down in Las Vegas. So we called the AC guys to install the new heaters and air-conditioners now rather than at the end of the project.

The air-conditioners sit on the roof of the house and therefore, they had to bring out a crane to hoist these 1,000 lb units up on top of the roof. It was kinda cool. Pun intended.


Sunday, December 5, 2010

Chapter 20 - Back Porch Build

Watch what happens to the back of the house...

April 2009 - The Original House back view

The balcony was rotting away with old artifical turf and decaying floorboards

We removed the railings, floor and structure of the back porch

Next, we removed all the old windows on both the first and second floor and reframed the entire back of the house

We began to rebuilt by creating new footings and posts to hold the new, much larger balcony

While we restructured the back porch, we also installed brand new top-of-the-line Anderson windows across the entire back of the house

We added an access door from the loft room as well as a new window and new roof lines that flank both sides of the balcony

The roof line on the right side sits right under the picture window of the Master Bathroom.

Laying down the floor of larger, half-round balcony
The Master Bedroom has a new beautiful sliding glass double door
 
The balcony and porch along with the roof line are complete and the "look" of  balcony began to take shape.


Lathe (chicken wire) is applied so that stucco can be added.

A thin sheet of concrete is smoothed over the floor of the balcony

The roof of the porch is beautiful cedar planks.
With the roof completed, we added new and repaired old stucco. Then we destroyed the red-dyed concrete patio.


The back porch columns ready to be assembled

The Back Porch compete!

THE BACK OF THE HOUSE NOW!!!


Monday, November 1, 2010

Chapter 19 - Paint!

So how many gallons of paint does it take to cover both the inside and outside of our house? Well, let’s see how much fun we can have with this…ok? Like that carnival game where you are supposed to guess the exact number of jelly beans in the jar, I’m not going to reveal the exact number of gallons until the end of this chapter. In the meantime, feel free to respond to the blog with your guess and we’ll see who came closest. I’ll give you some clues to help you out.


Clue #1 – If you remember from the drywall chapter, we nearly replaced the entire inside of the home’s drywall. The new drywall AND the older drywall were all textured to make the walls and ceilings consistent through the home. This meant that we had to repaint the ENTIRE inside of the home…six bedrooms, five bathrooms, kitchen, family room, living and dining rooms.

Clue #2 – Before the paint can go on the walls; the new drywall had to be primed. I guess primer isn’t considered paint, but I don’t know why because it goes on like paint and looks like it?

Clue #3 – After priming the new drywall, we started by painting the ceilings. I’m not sure what order the pro's go in…the walls or ceilings first….but we thought it best to start from the top and work our way down. We borrowed a paint sprayer from a friend, Mary & Bernhard Schneider, for this job, but soon found out the sprayer was a little underpowered and wasn’t putting down an even spray pattern. So we got another paint sprayer and put on two more coats of flat white paint to cover all of the ceilings. Most of the ceilings in the home are only 8’ high, so reaching them wasn’t difficult…but oh what crooked necks we had the next day! Ouch! The great room ceiling is vaulted two stories. Just like when we had to scrape the popcorn texture off the ceilings before, we rigged up some scaffolding and planks to span over the staircase. Scarrry!!

Clue #4 – I think ½ the ceiling paint actually fell down onto us rather than got up onto the ceilings, as you can see in this photo. Hilarious!
Clue #5 – Next came the walls. But before we could start spraying again we first had the laborious task of taping and masking all of the doors, windows and ceilings that we just painted. This task itself took an entire day to finish. Just like the ceiling, we sprayed two coats on the new walls, first going in an up and down motion, then a horizontal pattern. This was just like doing squats in gym class, but for 8 hours! It was almost impossible for either of us to get out of bed the next morning.

Clue #6 – Let’s go outside, ok? First up was to tackle the eves, and the first step was to prime the wood. There was some new construction to paint, and much of the older wood eves after 30 years actually had very little paint left on them. So of course priming was very important. Thankfully the scaffolding from the stucco work was still up, so actually getting to the high points on the home was pretty easy. The ugly part of this task was that spraying in such tight areas created a lot of overspray. Check out this photo! In just a few
hours I changed colors. Ha ha.

Clue #7 – It was exciting to actually be putting some color on this house when we moved outside to paint the walls. The color we finally decided on actually came from a combination of two paint colors. We didn’t want the color to be too pink, too yellow or too red. We ended up with a muted peach. As the roof tiles have now been put down, and black balcony and fence railings have been installed, the peach is toning down. I think that once the stone work is in place and the landscaping is in that it’ll be just right. Back to the amount of paint used, remember to consider in your guess that we again applied two coats on the house.

Clue #8 – The brick fence wall around the front and both sides of the home had become discolored over the years, so I had it covered in stucco. We chose to paint the stucco in the same color as the house. Mitzi painted all of the walls by herself. In fact, even though I might have started out painting,
Mitzi did most of the painting on the outside of the home, even showing great courage and getting up to the high points of the structure. (I think she really liked using the paint sprayer and having the power in her hands.)

Ok, so do you have a good guess tabulated yet on the total gallons used on this home? Remember, primer and paint, two coats both inside and outside.

165 gallons!

Were you close?
Alex from Home Depot - Our Paint Expert! He promised to give us his apron as a memento of our 165 gallons


Thursday, October 28, 2010

Chapter 18 - Entrance, Roof & Stucco

The Phoenix is Rising! We started to completely transform the front of the house when we built the turret. Remember Chapter 15? Steve furthered the entrance development by adding a beautiful cedar roof. He managed to cut plywood to create a ceiling, balancing the sheets on his head while he nailed them to the top. Then while climbing up and down the 2-storied scaffolding, he measured and cut each individual plank of cedar. Although it was time-consuming and strenuous, it turned out gorgeous and elegant. The entrance is just waiting for the rock work and pavers for the floor.


Next, the old leaky roof was on the hit-list. The red tiles of yester-year were removed and new darker modern tiles were substituted. Here is something completely unknown to me before but when you remove the heavy tiles from the roof, the house actually expands and relaxes with the weight off its shoulders. This relaxation actually causes some problems like cracking ceilings, split walls and creaking floors. So, the new tiles have to be set on the roof immediately to maintain the pressure. The roofers did not actually lay down the tile in order but just in stacks until the stucco had been updated.


The roof line was extended to even up the face of the house

Roof tiles weighing down the house and waiting to be placed

Time for the Stucco renovation - The outside of the house had a very old-fashion and dated stucco that lends itself to the Spanish look of the original house. One of the first things that we wanted to do was get rid of that terrible stucco, and it has taken us six months to get to the place where we can give the house a facelift. To prepare the house for the new finer stucco finish, all of the new construction had to have chicken-wire put on to hold the stucco. The proper term for this is lathe. Once the lathe is up, then the old stucco had to be sanded down. Next step, the gray scratch coat covers the entire house, covering the old stucco, the holes and chip outs and the new construction.


When the gray scratch coat went up, that is when we saw a new house not just a renovation. Gone was the old white rundown house and suddenly a new unique house emerged. It was exciting! The final stucco coat was the finish, a fine sand texture finish that definitely modernized the home.

Sunday, October 3, 2010

Chapter 17 - The Walls Came Tumbling Down

Early on in our renovation, we realized that we would have to take down some drywall. The house is over 30 years old and for most of that time, it had been a rental home. So, the walls were covered in mismatching wallpaper, layers and layers of paint with whole lot of bangs and holes. We had a very hard time salvaging the walls as we tried taking down the wallpaper and ended up ripping the drywall as well.


Another problem we had with the walls was the electrical work that had to be updated. During our preliminary electrical inspection, the city inspector decided that ALL of the electrical wiring had to be updated to today's code. When the electricians began running new wire through out the house, a lot more ceilings and walls had to come down as they cut large portions of wallboard all over. Approximately 85% of the house was gutted right down to the studs.

The electrical and plumbing inspections passed perfectly and we had to start putting the house back together. Steve replaced and added insulation where it was needed. It was a miserable job since the temperatures were still in the 100's. Heat, insulation and dust made this very nasty business.

We figured that drywall can not be that difficult to hang - just put the board on the wall and drill in some screws, right? Well, that is right but
not so easy. It takes talent to line up the drywall with the studs and get the seams right. We forged a head and did several rooms, impressing ourselves if I do say so, until a sub-contractor came to bid on the mud, plaster and sanding part of drywall. He gave us a bid for everything, including hanging the drywall for so cheap and so fast, we just set our drills down right then and there. These guys were amazing. What would have taken us a week or two, took them 3 days.
With all of the drywall up, the house feels like a house again. (But I miss being able to take short-cuts and walk through walls). Next, here comes the stilt-walking mudders. These labors strap on stilts and walk around the house, taping the drywall seams and then adding plaster mud. After that drys, they sand the plaster down for a smooth finished wall.